Friday, August 3, 2012

Macaroni and cheese in the crock pot


Ever get a hankering for something you haven't had in a long time? I do! This time it was macaroni and cheese. Yes, I know it seems juvenile as my taste buds have grown up, but all grown-ups are true kids at heart.

I knew that my husband couldn't eat this dish (he is allergic to dairy). I knew that I didn't want to eat the whole pan, no matter how big the craving. I mentioned it to two of my co-workers April and Hannah. To my surprise they both wanted to contribute to the lunch I was bringing. April brought salad and Hannah brought bread. Wow! Thanks guys.

This recipe is super easy with great results. All you do is melt your butter in a sauce pot with grated cheese. I chose extra sharp Cheddar for its flavor. While you are melting, boil your noodles for 6 minutes. Dump the butter/cheese mixture into your crock pot. Add the other ingredients including the macaroni. Stir. Cook it on high for 2.5 hours stirring occasionally.

Warning: If you stick the mac and cheese hot from the crock pot into the fridge it will separate. My mac and cheese was done at 11:00pm. A good 13 hours before I was going to be serving it at work. It still tasted good though. When I re-heated it, I had some burnt cheese come up from the bottom. UMMM burnt cheese!

The salad and bread that April and Hannah brought really rounded out the meal and we had a true lunch together. At 12:30 most of us were eating in the break room.

The day of the lunch a couple more of my co-workers suggested a sign-up sheet so they could bring stuff to contribute also. Which is a good idea. I will have to do that in the future.

Once lunch was over, I went to go and wash the crock pot, but Diana had already beaten me to it. I have to say that, that meant so much to me. As an artist, you enjoy creating, but never cleaning. Cleaning is a necessary evil, that makes creating possible. So a million thank you's to those of you who are willing to do the grunt work of cleaning.

If you would like to make this childhood remembrance in your cooking district here is the recipe.

CROCK POT MACARONI AND CHEESE

Ingredients

  • 2 cups uncooked elbow macaroni (an 8-ounce box isn't quite 2 cups)
  • 4 tablespoons (1/2 stuck) butter, cut into pieces
  • 2 1/2 cups (about 10 ounces) grated sharp Cheddar cheese
  • 3 eggs, beaten
  • 1/2 cup sour cream
  • 1 (10 3/4-ounce) can condensed Cheddar cheese soup
  • 1/2 teaspoon salt
  • 1 cup whole milk
  • 1/2 teaspoon dry mustard
  • 1/2 teaspoon black pepper
  • Directions

  • Boil the macaroni in a 2 quart saucepan in plenty of water until tender, about 7 minutes. Drain. In a medium saucepan, mix butter and cheese. Stir until the cheese melts. In a slow cooker, combine cheese/butter mixture and add the eggs, sour cream, soup, salt, milk, mustard and pepper and stir well. Then add drained macaroni and stir again. Set the slow cooker on low setting and cook for 3 hours, stirring occasionally.
    Photo credit:
    kidscooking.about.com

    Original recipe created by Paula Deen
Tuesday, July 24, 2012

Forever Ginger ---Almost

A few months or so ago I was watching Rachel Ray on the Food Network. During her program she mentioned freezing ginger.


I thought, what a great idea! Ginger is one of those ingredients that is always better whole than in powder form. But, because it is so powerful, recipes only call for it in small quantities. If you had purchased a big twisted hunk of ginger, like my friend up there. It would inevitably go to waste. Either that, or you move to China and set up shop as a street vendor. I hear competition is really steep.

Since I'm guessing you lost your passport, the only thing left to do is freeze your ginger. I purchased mine from a local grocery store. Still not that big hunk up there, but enough that I would use in about 4 months time.

Once home, I peeled the ginger, wrapped it in tinfoil and stuck it in the freezer. When I need it, I unwrap the tinfoil and grate it into the dish I am making and then back into the freezer it goes to be used again later. What a good idea. Thanks Rachel!

Photo Credit:
Buzzle.com


Sunday, July 15, 2012

Awesome Party!!!

Yesterday I hosted a book club party. Although officially we are not a book club. It was just some of the girls from work reading the same book at the same time as a suggestion of another co-worker. So it was an impromptu book club. Whatever it was; it was super fun!

As the host I made treats that were super delicious. I worked hard in my cooking district all day to have this cornucopia ready for the party.

The menu was as follows

Pulled pork sandwiches


Yum

Frog eye salad

Summer squash pasta salad Umm!

Then for dessert I made individual lemon meringue tarts.Donnie and Tracy were very impressed and could hardly believe that these treats were all home made.

To make this party even funner, I had a couple of mixed drinks waiting for my guests. Since we are all of the non-alcoholic persuasion, these mixed drinks had no alcohol in them. I got them from drinksmixer.com. Which has hundreds of non-alcoholic beverages on there along with all the alcoholic ones as well.
 The two I picked were "Safe Sex On the Beach" and "Southern Ginger"
They were a big hit too!

So now that you know the food was amazing, the conversation was equally top notch. We answered questions about the book posted by LitLovers. They were good, but we also came up with our own questions and answered them as well. I was so impressed with Dawney and Tracy's thoughtful comments and questions.

Then we watched "Rebecca" directed by none other than the great Alfred Hitchcock (It was his first movie). Due to the lateness of the hour and our full bellies, we all fell asleep at different points along the way, but we always woke up again.

All in all, I would say this party and book club have been a success. And if nothing else, we now have a name for our book club. Which will now be known as the Impromptu Book Club. New members will be accepted.

Due to the exhaustive cooking done in this district for this post, if you want a recipe contact me directly.

Happy Cooking!!!

Image Credits as follows:
debbie.net
dvo.com
myrecipes.com
brightideas.com
recipecan.com
glam.co.uk

Tuesday, July 3, 2012

Whole Wheat Chocolate Bread Pudding


Picture of Chocolate Bread Pudding Recipe

This post is less on timeliness (tomorrow is the 4th of July) and more about using what you have. A 
couple of weeks ago, I had made hamburgers for dinner. We like the Oroweat hamburger buns. Since there is only the hubby and me to make dinner for, I routinely have leftover buns, which sit in the pantry and mold until I through them out.

This is truly unacceptable because those suckers are expensive! What to do? What to do? Ah, I know! I'll make bread pudding.

 I searched on the internet for a recipe and found Paula Deen's Chocolate Bread Pudding. I thought, "the only thing better than bread pudding is chocolate bread pudding". I followed her recipe exactly, except I did not use french bread. I used my old hamburger buns. It turned out great! I mean really, how badly can you mess up a recipe that has heavy cream and brown sugar in it.

The next day I took my creation to work. At first the test bunnies (aka my co-workers)
 were startled.
They had never thought about making a bread pudding from hamburger buns. But since I had fed them before with favorable results and my dessert did have chocolate in it, they ate the whole pan.

Smiles and complements abounded as the treat was enjoyed. My favorite was from Ryan. He told me. "Rada, I am going to save all my leftover hamburger buns, so that you can make me this bead pudding again." Thank you Ryan. If you bring them to work, I probably will.

If you want to make this bun saving dish in your cooking district here is the recipe.

Chocolate Bread Pudding

 Ingredients


Directions

Preheat oven to 325 degrees F.

Lightly grease a 13 by 9-inch baking dish and place the bread in the dish. In a large bowl, whisk together the milk, cream, and liqueur. Using another bowl, combine the sugar, brown sugar, and cocoa powder and mix well. Add the sugar mixture to the milk mixture and mix well. Add the vanilla and almond extract, and cinnamon to the beaten eggs. Combine the egg mixture to the milk mixture and mix well.
Stir the grated chocolate into the mixture. Pour the mixture over the cubed bread in the pan. Let the mixture stand, stirring occasionally for approximately 20 minutes or until bread absorbs most of the milk mixture. Bake pudding for 1 hour or until set. Check pudding by inserting a knife through the middle and it should come out clean.

Serve the pudding warm, or refrigerate and serve chilled with whipped cream if desired.

Image Credits to:
 carlylyn.deviantart.com
foodnetwork,com

Wednesday, June 13, 2012

South Seas Chicken and Bananas

When I was 7 my family moved to St. Lucia so my dad could go to medical school. It was an interesting experience to mingle with a different culture, including the local wildlife (hop toads!) We had no car and either road the bus or walked.


See that little dot on the bottom right corner of the map? That's where we lived. My Mom cooked us as normal a meal as possible that we were used to in the states. My mother was and still is a picky eater. I did have some really good ice cream there though. I can still taste it in my mouth when I remember that afternoon. I have not had that flavor before or since.

When I saw this recipe it reminded me of living in the Caribbean. So for that reason alone I had to try it. I was not disappointed. This recipe is so easy and flavorful. A very different take on chicken, which can get monotonous after awhile.

I found this recipe in  Taste of Home Annual Recipes for 1995 on page 87. Wendy Smith of Eagleville PA sent it in. I just want to ask, Wendy, have you ever been to St. Lucia? Because you nailed it.

If you are tired of cooking chicken the same old 5 ways, give this recipe a try.

South Seas Chicken and Bananas
 

Ingredients
1/4 cup lemon juice
1can (14 oz) sweetened condensed milk
1/3 cup milk
1/2 cup flaked coconut
1/8 tsp cardamom
6 very firm bananas
 5-6 lbs chicken peices
3/4 cup butter or margarine, melted, divided
Sliced kiwi fruit and star fruit optional (I could not find star fruit, so I substituted a papaya instead)

Directions 
In a food processor or blender, blend the lemon juice, condensed milk, regular milk, coconut adn cardamom until smooth. Pour into a bowl. dip bananas into the milk mixture; roll in cornflakes and set aside. Dip chicken into the remaining milk mixture; roll in remainig corn flakes and place on 2 greased 9x13 inch pans. Drizzle with 1/2 cup of the melted butter. Bake, uncovered at 350 degrees for one hour. Arrange bananas over chicken. Drizzle remaining butter. Bake another 15 minutes longer or until the juices run clear. Garnish with fruit if desired
Yield 6-8 servings
 
Nutritional Facts 1 serving (13 ounces) equals 856 calories, 42 g fat (20 g saturated fat), 174 mg cholesterol, 592 mg sodium, 79 g carbohydrate, 2 g fiber, 43 g protein.
Originally published as South Seas Chicken and Bananas in Taste of Home April/May 1994, p27


Saturday, June 2, 2012

Fun Food Quotes

"You can't do any better in this life than to put something delicious in a friends mouth." --Jack Butler

"If people take the trouble to cook, you should take the trouble to eat." --Robert Morley

"Cooking is like love. It should be entered into with abandon or not at all." --Harriet Van Horne

"I don't like gourmet cooking or this cooking or that cooking, I just like good cooking." --James Beard


"A house is beautiful not because of its walls, but because of its cakes." --Old Russian Proverb

"Cookery has become an art, a noble science." --Robert Burton

Friday, May 11, 2012

Strawberry Pie


The other day I was at Costco. I wanted some strawberries for pie. The grocery stores around here have strawberries, but it is usually more money for less product and the quality is not the same. I can not speak for all produce, but that is my observation. Anyway, I bought the 2lb pack of strawberries. They were $1.88/lb.

When I made the pie, I started with the pie crust, so that it could bake and cool while I made the filling. (Such a smart cookie!)

Pie crust is hard for a lot of people to make. The dough is either too dry, or to wet. When they roll it out, it sticks to the counter. I used to have those problems too. But I have found the recipe that is so easy and if followed exactly, you will get perfect (compliment winning) pie crust every time.


I cannot lie, I did not create this perfect pie crust dough myself. Ina Garten the Barefoot Contessa developed it, and I am forever grateful. The secret to her recipe I believe is that her fat is COLD; and it stays COLD. So on with my experience.

I placed flour, salt and sugar in a food processor. Then I blended it to combine. Then I added cold butter, which I had diced and 1/3 cup of shortening which was also cold. I keep mine in the fridge, just like Ina so I can make a pie crust in a hurry.

After the fat was added I pulsed it in my food processor till the mixture became the size of peas. Then I turned on the processor at full speed and added 6 tablespoons of ice cold water, at which point my mixture came together into a dough.

Out of the food processor it went, and onto a floured board for just a couple of turns to form it into a more solid ball and to be wrapped in plastic wrap and thrown in the fridge for 30 minutes to rest.
Once the pie crust dough had rested, I cut it in half and rolled it out, and placed it in my pie plate. Then I put tinfoil over the top. I looked for beans to put on top of the tin foil, so the pie crust would not puff up. This process is called blind baking. No, I don't know why. I did not have any beans, so I opted for pasta instead. The pasta did not work as well as the beans. The pasta actually browned in the oven. But I look forward to putting them in a soup or something and see if the baking enhances their flavor.

While the pie crust cooled, I prepared the filling. I took all of my strawberries, and cored them. In a medium saucepan, I took a cup of sugar and some corn starch and some cold water and dissolved it. Then I turned on the stove to heat up the mixture. When the mixture had thickened, I added one package of strawberry gelatin. and took it off the stove to cool to room temperature.

When everything was a room temperature, I placed my cored strawberries in the pie crust and piled them high. Then I dumped the gelatin mixture on top and waited for it to set up completely in the fridge.


One note: I must have not let the cornstarch mixture cook long enough on the stove before I took it off. Therefore it never really set up. It still tasted good though.

If you want to make this recipe in your cooking district, here is the recipe!

Perfect Pie Crust

 Ingredients

  • 12 tablespoons (1 1/2 sticks) very cold unsalted butter
  • 3 cups all-purpose flour
  • 1 teaspoon kosher salt
  • 1 tablespoon sugar
  • 1/3 cup very cold vegetable shortening
  • 6 to 8 tablespoons (about 1/2 cup) ice water

Directions

Dice the butter and return it to the refrigerator while you prepare the flour mixture. Place the flour, salt, and sugar in the bowl of a food processor fitted with a steel blade and pulse a few times to mix. Add the butter and shortening. Pulse 8 to 12 times, until the butter is the size of peas. With the machine running, pour the ice water down the feed tube and pulse the machine until the dough begins to form a ball. Dump out on a floured board and roll into a ball. Wrap in plastic wrap and refrigerate for 30 minutes.

Cut the dough in half. Roll each piece on a well-floured board into a circle, rolling from the center to the edge, turning and flouring the dough to make sure it doesn't stick to the board. Fold the dough in half, place in a pie pan, and unfold to fit the pan. Repeat with the top crust.

Fresh Strawberry Pie

By: Janice Papola 

Ingredients

  • 2 (8 inch) pie shells, baked
  • 2 1/2 quarts fresh strawberries
  • 1 cup white sugar
  • 2 tablespoons cornstarch
  • 1 cup boiling water
  • 1 (3 ounce) package strawberry flavored gelatin

    Directions

    1. In a saucepan, mix together the sugar and corn starch; make sure to blend corn starch in completely. Add boiling water, and cook over medium heat until mixture thickens. Remove from heat. Add gelatin mix, and stir until smooth. Let mixture cool to room temperature.
    2. Place strawberries in baked pie shells; position berries with points facing up. Pour cooled gel mixture over strawberries.
    3. Refrigerate until set. Serve with whipped cream, if desired.

    *****Read this note before making this recipe*****

    This is the same filling I've used for about a year for making strawberry pie (the sugar, cornstarch, water, and jello). However, the amounts listed are what I use to make ONE pie! I have no idea how this amount of filling would cover enough strawberries for 2 pies. Also, my recipe calls for cold water (when mixing it with the jello, cornstarch, and sugar), bringing it all to a boil and boiling it for 5 minutes, stirring frequently. I've never had one turn out soupy or rubbery.


Monday, April 30, 2012

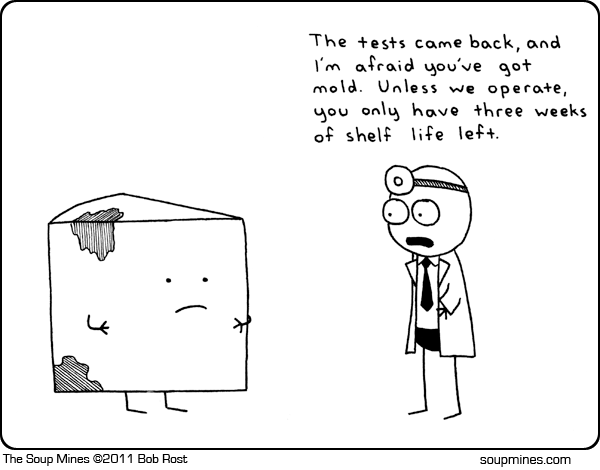
No More Moldy Cheese!


Ever open the refrigerator and seen this?


Or maybe even this?


I know that unfortunately I have. And I am betting you have too. Moldy cheese is a problem all over the world. We love our cheese, but we can't seem to get rid of the pesky green and white mold that infects it; lurking in the darkness of the refrigerator.


Never fear. I have now found the answer! No more will you be tormented by moldy cheese lurking in your fridge. The lovely people at America's Test Kitchen, have done all the work for us.

Whether you've got leftovers from your party cheese platter or a single wedge of Parmesan that you want to make last, the issues are the same --storage. Storing cheese presents a conundrum: as it sits, it releases moisture. If the moisture evaporates too quickly, the cheese dries out. But if the moisture stays on the cheese's surface, it encourages mold.


Specialty cheese paper avoids this problem with a two ply construction that lets the cheese breath
without drying out, but usually requires mail ordering. To find a simpler method, we tried wrapping cheddar, Brie, and fresh goat cheese in various materials, refrigerated the cheeses for six weeks, and monitored them for mold and dryness. Cheeses wrapped in plastic -- whether cling wrap or zipper lock bags--were the first to show mold. Cheeses in wax or parchment paper alone lost too much moisture and dried out. The best method: wax or parchment paper loosely wrapped with aluminum foil. The paper wicks moisture away, while the foil cover traps enough water to keep the cheese from drying out. Wrapped this way, even highly perishable goat cheese kept for about a week, and the Brie and cheddar were almost like new more than a month later.

So take a page from the experts, double wrap your cheese and never see mold in your cooking district again. Happy cooking!

Saturday, April 14, 2012

Roast Chicken Enchiladas Suizas Stacked Cassarole

One of my favorite movies is Guys and Dolls with Frank Sinatra and Marlin Brando. In one scene where Nathan Detroit (Frank Sinatra) meets Sky Masterson (Marlin Brando). Sky tries to convince Nathan to eat some cheese cake. Nathan puts up some fuss, and then Sky says. "Eat this. You will thank me." That is how I feel about this dish. If you decide to make and eat it, you will be thanking me. Of course, I did not develop this recipe. That credit goes to Rachel Ray, on her "Week in a Day" series.

The recipe starts out roasting poblano chili peppers.


You put the peppers on a sheet pan and then place them under the broiler and char them until blackened on all sides. This should take about 10-12 minutes. Leave the oven door cracked open, not only to check on the charring, but to let the steam escape also. Once they are charred on all sides put them in a bowl and cover it tightly with plastic wrap. That will allow you to remove the charred skin, once the peppers cool. You will want to take the seeds out also.

Truth be told, I would have loved to have the poblano peppers in my dish, but when I took them out of the crisper, fuzz had started growing on them. I couldn't in good conscience use them in my dish.

 
Moving on, I chopped one onion and seeded and chopped a jalapeno. I added these aromatics to a pan that had olive oil and sauteed them. Then I added 4 chopped cloves of garlic. My kitchen started smelling really good.

While the onion, jalapeno and garlic were getting to know each other in the saute pan, I turned my attention to the tomatillos and the food processor.
I removed the husks, washed them and placed them in a food processor. to which I added a handful of cilantro. If your poblanos did not have fuzz, you would add them here, seeded and chopped.

I am going to go off on a side tangent here. Aren't food processors wonderful! you can combine ingredients so quickly and chop things so much finer in less amount of time. I
love them. Okay, back to the recipe.

Pulse the tomatillos, poblanos, and cilanto until a smooth sauce forms. Then add it to the pan with the onion, jalapeno and garlic. Everybody in the pool!

Then add cumin, to increase the smoky flavor of the dish, honey to take some of the heat out of the peppers and a box chicken stock. I thought i had enough stock, but I did not, so I substituted cream of chicken soup. I thought it would bring at least as much chicken flavor to the dish as the stock would. I let all of this simmer on the stove for twenty minutes, while I shredded my chicken. 

Once the chicken was shredded, it was time for assembly.
In a 9x14 inch pan put down some of the tomatillo sauce. Then add the tortillas, you can use either corn or flour. I used corn. Then add the shredded chicken, dot with small spoonfuls of sour cream and sprinkle with Jack and Swiss cheese. I thought Swiss was an interesting choice, but I like it in here because it has a slightly bitter flavor which balances out the honey. Repeat the layering process twice more.

Have your oven heated to 375 degrees and place casserole in it to heat through. It might be a good idea to put the casserole dish on a sheet pan, in case the cheese bubbles over. Then you won't have to clean your oven.

Ta da!!! Your family will never recognize the tired left over chicken from a few nights ago in this dish.

If you would like to make this dish in your cooking district, here is the recipe.

Roast Chicken Enchilada Suizas Stacked Casserole

Ingredients

  • 4 medium poblano peppers
  • 2 tablespoons extra-virgin olive oil
  • 1 jalapeno, chopped
  • 2 medium onions, chopped
  • 4 cloves garlic, finely chopped
  • 12 medium-large tomatillos, peeled, rinsed and quartered
  • 2 small handfuls cilantro leaves
  • 1 teaspoon ground cumin, 1/3 palmful
  • 2 teaspoons honey
  • 1 quart chicken stock-in-a-box
  • Salt and freshly ground black pepper
  • 1 lime, juiced
  • 2 pounds cooked chicken, meat pulled or shredded
  • 12 (6-inch) flour tortillas or 16 (5-inch) corn tortillas, softened over flame or dry skillet
  • 1 cup Mexican crema, creme fraiche or sour cream
  • 1 1/2 cups shredded Swiss cheese (from about 1/2 pound piece)
  • 1 1/2 cups shredded Monterey Jack cheese (from about 1/2 pound piece)
  • Raw red onion rings, for garnish

    Directions

    Heat the broiler to high. Arrange the poblanos on a sheet pan, put them under the hot broiler and char until blackened an all sides, 10 to 12 minutes. Leave the door of the oven cracked to allow the steam to escape. Peppers can also be easily charred over and open stovetop flame if you have gas burners. Put the peppers in a bowl and cover tightly with plastic wrap. Allow the peppers to sit until cool enough to handle. Peel and seed the peppers.

    Heat the extra-virgin olive oil, 2 turns of the pan, in a skillet over medium-high heat. Add the jalapeno, onions, and garlic and cook until the onions soften, about 5 minutes. Put the tomatillos and a small handful of cilantro in a food processor. Coarsely chop the poblanos and add them to the processor. Process until almost a smooth sauce forms, about 1 minute. Pour the sauce into the skillet and stir to combine. Stir in the cumin, honey and stock, and season with salt and pepper, to taste. Reduce the heat and simmer about 20 minutes, then add the lime juice and turn off the heat.

    Pour a thin layer of sauce into the bottom of a medium casserole. Layer in 3 flour tortillas or 4 corn tortillas then top with some shredded chicken, dot with some sauce and small spoonfuls of Mexican crema, creme fraiche or sour cream and sprinkle with a little Swiss and Jack cheeses. Repeat twice more. Cool and chill for a make-ahead meal.

    Preheat the oven to 375 degrees F. Put the casserole on a baking sheet and bake until heated through and bubbly on top, about 40 to 50 minutes. The baking sheet will catch any drips of sauce or cheese. Garnish the stacked enchilada casserole with raw red onion rings and serve.